Reproducing Deep Image Prior
Reproducability project of group 41 for CS4240-Deep Learning course. Reproduces Inpainting and image restoration parts of the paper "Deep Image Prior"
Project maintained by RPraneetha Hosted on GitHub Pages — Theme by mattgraham
Reproducing Inpainting and Image Restoration from Deep Image Prior
Introduction
The goal of this project is to reproduce figure 7 and table 1 of the paper Deep Image Prior by Dmitry Ulyanov et. al. The goal of this paper was to show that for image generation and image restoration tasks, the structure of a network with randomly-initialized weights can function as a handcrafted prior, and the performance of this network on tasks like inpainting, image restoration, flash-no flash reconstruction, etc. is comparable to that of learning-based methods. The authors did this by they used untrained deep convolutional neural networks and instead of training it on a huge dataset, they fit a generator network to a single degraded image. They highly emphasize that the only information required to solve image restoration problems is contained in the single degraded input image they have given as input, and the handcrafted structure of the network.
A Few Formulae
Neural networks usually used in practice, specifically trained networks which first learn from date and then are applied to solve image tasks use
where is an image which is mapped to a random code vector . The network described in this paper captures the information learnt solely on the basis of its architecture, without learning any of its parameters. This is done by considering the network itself as a parameterization of the input image.
Image restoration tasks can be formulated as minimizing the term
where is a task-dependent data term, is the corrupted image and is the regularizer. This regularizer is replaced with the implicit prior captured by the network as
consequently formulating the problem as
Playing Architect
This paper uses a handcrafted encoder-decoder architecture with skip connections as shown in Figure 1 as given in the supplementary material.
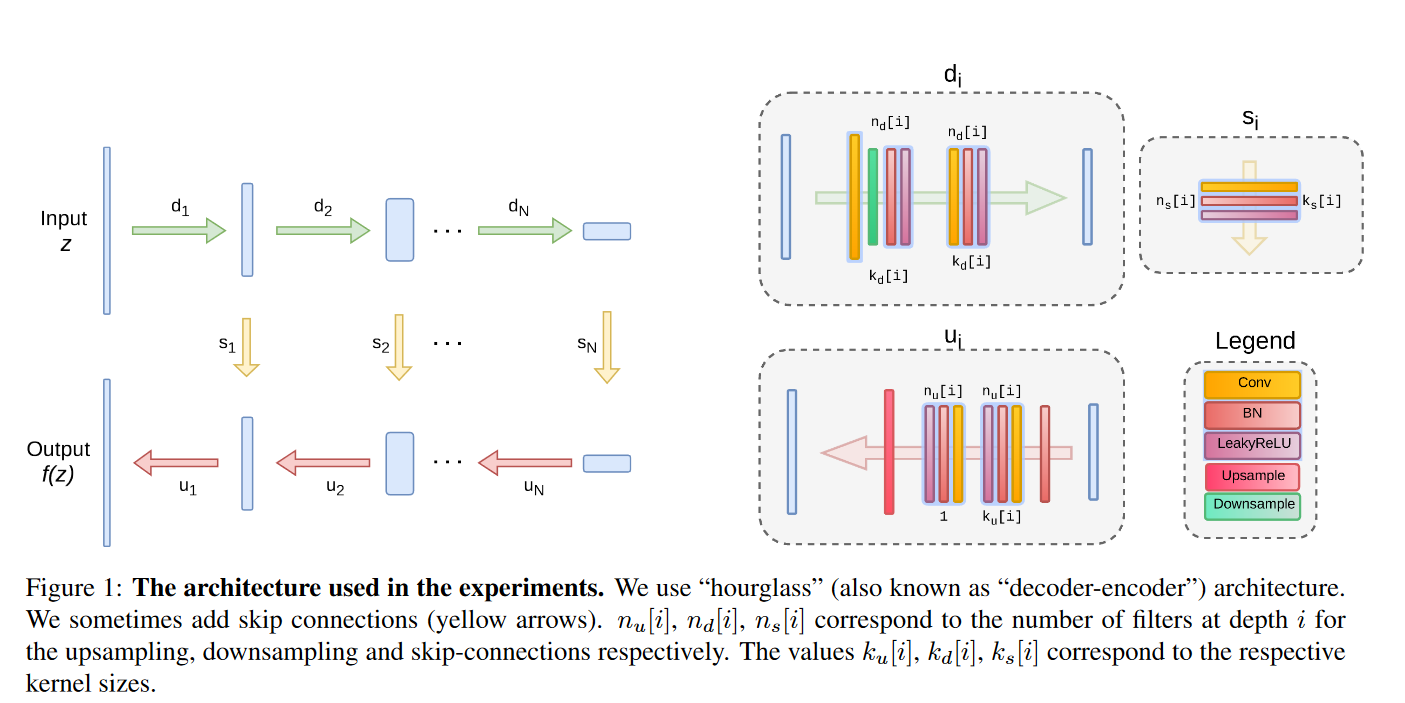
The architecture is based on a U-net “hourglass”, and is a fully-convolutional encoder-decoder architecture, where the input of the network has the same spatial resolution as the output of the image . LeakyRELU is used as a non-linearity, and the downsampling method technique used is strides, implemented within the convoltuional modules. Upsampling operation is nearest neighbour upsampling for the inpainting application, and bilinear for image restoration. We have used reflective padding in all the convolutional layers. For the input we have generated noise randomly using Bernoulli sampling, and for the optimization process, we have used the ADAM optimizer. The optimal results can be obtained when the network is carefully tuned to a particular task, and so clearly the parameters and the architecture will differ for each task.
Man the Parameters
The authors have given the hyperparameters they have used in the implementation of their code, but there is a discrepancy
between the parameters they have provided in the supplementary material and the ones they have used in the code. In case of such conflict,
we have used the parameters as given in the code. (We have tested our code with both the sets of hyperparameters and did not find any significant difference.)
The standard architecture uses the following set of hyperparameters:
Get the Data
We have used the data provided by the authors of the paper for evaluating our results against theirs. In addition to this data, we have also used a few of our own images to test the reproduced code. We also created custom text and mask overlays for the inpainting task, and have used a random noise generator for the image restoration task. All the images are available in the Github repository of this project.
It is not the same code… Or is it?
This paper has been implemented by the authors, and the code is available on Github, available here. After studying and analyzing the code, we found that it was not modularized, especially the models used, and are monolithic chunks of code. To improve readability and understandabilty of the code, we have rewritten the skip architecture implemented by the authors by referring only to the supplementary material and later verifying it by comparing against their code. For the inpainting and image restoration tasks, we have created Jupyter notebooks and outlined all the tasks performed.
How do I run this super cool project?
To run this project, first clone the project to your local system using
git clone https://github.com/RPraneetha/DL-RP41-Deep-Image-Prior
Now, this project can either be run directly in your system, or in Google Colab. We would recommend running it on Google Colab, unless you have access to a powerful machine, or you are secretly an intern at CERN.
Running it locally
- You will need to install Jupyter to run Jupyter notebooks. Instructions for doing so can be found here
- cd into the repo cloned above,
cd DL-RP41-Deep-Image-Prior/ - Run the following command to launch the Jupyter Notebook App
jupyter notebookThis opens up a Notebook Dashboard, and you should see
Inpainting.ipynbandImage_restoration.ipynb. - Click on the notebook you want to play with, and start executing!
Note: Skip the sections about mounting the Google Drive(the first cell) when doing this method. More details on how to work with Jupyter notebooks can be found here.
Running it in Google Colab
- To run the project on Google Colab, upload the cloned folder into the root of your Google Drive.
- Open the notebooks, and start executing!
Note: Mounting the drive, as specified in the first section of both the notebooks, is important in this method otherwise the notebooks will not be able to access other files in the project.
Show Me The Code!
Architecture
We have modularized the architecture of the network and divided it into 3, DownsampleModule, UpsampleModule and SkipConnection which
contain the downsampling operations, upsampling operations and the skip connections respectively. These blocks are then used to build the network in the SkipArchitecture
class.
DownsampleModule
class DownsampleModule(nn.Module):
    def __init__(self, input_depth, num_filters, kernel_size, pad_size):
        super(DownsampleModule, self).__init__()
        self.activation_function = nn.LeakyReLU(0.2, inplace=True)
        self.batch_norm = nn.BatchNorm2d(num_filters)
        self.cnn_1 = nn.Conv2d(input_depth, num_filters, kernel_size, stride=2)
        self.cnn_2 = nn.Conv2d(num_filters, num_filters, kernel_size, stride=1)
        self.padder_layer = nn.ReflectionPad2d(pad_size)

    def forward(self, x):
        x = self.padder_layer(x)
        x = self.cnn_1(x)
        x = self.batch_norm(x)
        x = self.activation_function(x)

        x = self.padder_layer(x)
        x = self.cnn_2(x)
        x = self.batch_norm(x)
        x = self.activation_function(x)

        return x
UpsampleModule
class UpsampleModule(nn.Module):
    def __init__(self, input_depth, num_filters, kernel_size, pad_size, upsample_mode):
        super(UpsampleModule, self).__init__()
        self.activation_function = nn.LeakyReLU(0.2, inplace=True)
        self.batch_norm = nn.BatchNorm2d(num_filters)
        self.batch_norm_fixed = nn.BatchNorm2d(input_depth)
        self.cnn_1 = nn.Conv2d(input_depth, num_filters, kernel_size, stride=1)
        self.cnn_2 = nn.Conv2d(num_filters, num_filters, kernel_size=1, stride=1)
        self.padder_layer = nn.ReflectionPad2d(pad_size)
        self.upsample_layer = nn.Upsample(scale_factor=2, mode=upsample_mode)

    def forward(self, x):
        x = self.batch_norm_fixed(x)

        x = self.padder_layer(x)
        x = self.cnn_1(x)
        x = self.batch_norm(x)
        x = self.activation_function(x)

        x = self.padder_layer(x)
        x = self.cnn_2(x)
        x = self.batch_norm(x)
        x = self.activation_function(x)
        x = self.upsample_layer(x)

        return x
SkipConnection
class SkipConnection(nn.Module):
    def __init__(self, input_depth, num_filters, kernel_size, pad_size):
        super(SkipConnection, self).__init__()
        self.activation_function = nn.LeakyReLU(0.2, inplace=True)
        self.batch_norm = nn.BatchNorm2d(num_filters)
        self.cnn = nn.Conv2d(input_depth, num_filters, kernel_size, stride=1)
        self.padder_layer = nn.ReflectionPad2d(pad_size)

    def forward(self, x):
        x = self.padder_layer(x)
        x = self.cnn(x)
        x = self.batch_norm(x)
        x = self.activation_function(x)

        return x
The network defined in the downsampling, upsampling and the skip connections is as provided in the supplementary.
SkipArchitecture

class SkipArchitecture(nn.Module):
    def __init__(self, input_channels, output_channels, filters_down, filters_up, filters_skip,
                 kernel_size_down, kernel_size_up, kernel_size_skip, upsample_mode):
        super(SkipArchitecture, self).__init__()
        self.down_modules = nn.ModuleList([DownsampleModule(input_depth=input_channels if i == 0
        else filters_down[i - 1],
                                                      num_filters=filters_down[i],
                                                      kernel_size=kernel_size_down[i],
                                                      pad_size=int((kernel_size_down[i] - 1) / 2))
                                           for i in range(len(filters_down))])
        self.up_modules = nn.ModuleList([UpsampleModule(input_depth=filters_skip[i] + filters_up[i + 1]
        if i != len(filters_up) - 1
        else filters_down[len(filters_up) - i - 1],
                                                  num_filters=filters_up[i],
                                                  kernel_size=kernel_size_up[i],
                                                  pad_size=int((kernel_size_up[i] - 1) / 2),
                                                  upsample_mode=upsample_mode)
                                         for i in range(len(filters_up) - 1, -1, -1)])
        self.skip_connections = nn.ModuleList([SkipConnection(input_depth=filters_down[i],
                                                              num_filters=filters_skip[i],
                                                              kernel_size=kernel_size_skip[i],
                                                              pad_size=int((kernel_size_skip[i] - 1) / 2))
                                               for i in range(len(filters_up))])
        self.cnn_last = nn.Conv2d(filters_up[0], output_channels, 1, stride=1)
        self.sigmoid = nn.Sigmoid()
        self.number_of_channels = len(filters_down)

    def forward(self, x):
        skip_connections_list = []

        for i in range(self.number_of_channels):
            x = self.down_modules[i].forward(x)
            skip_connections_list[i] = self.skip_connections[i].forward(x)

        for i in range(self.number_of_channels - 1, -1, -1):
            if i == self.number_of_channels - 1:
                x = self.up_modules[i].forward(skip_connections_list[i])
            else:
                x = self.up_modules[i].forward(torch.cat([x, skip_connections_list[i]], 1))

        x = self.cnn_last(x)
        x = self.sigmoid(x)
        return x
We have chosen to concatenate the skip connections similar to a U-Net connection.
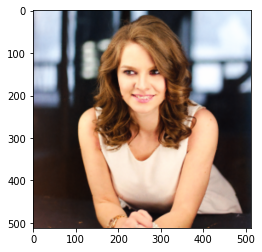
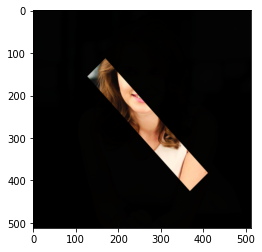
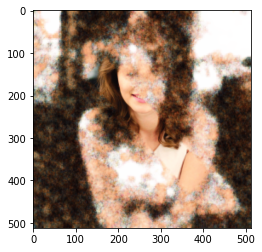
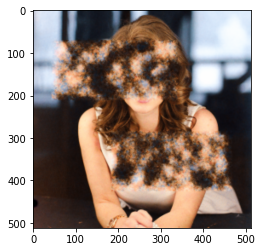
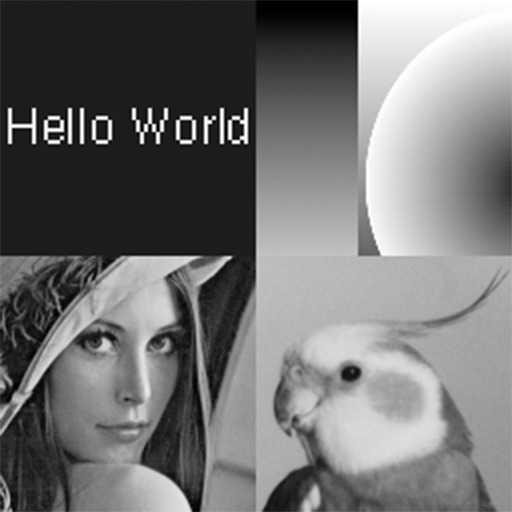
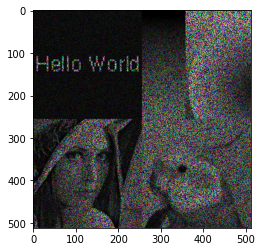
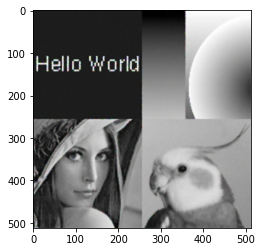
Inpainting
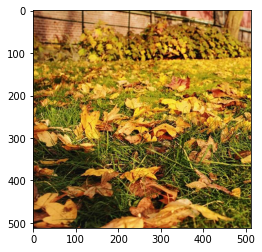
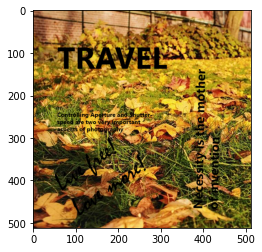
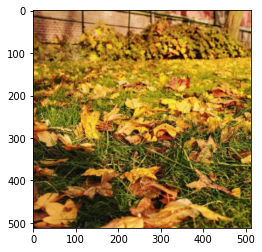
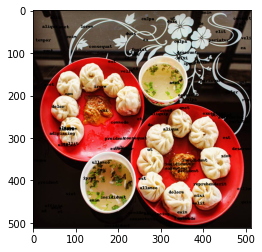
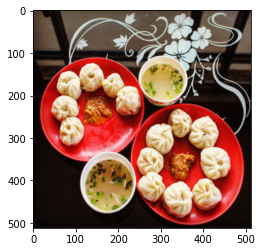
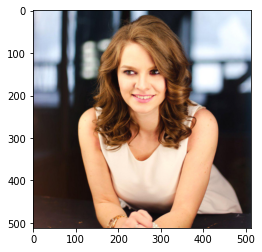
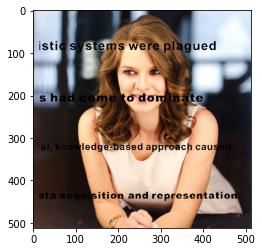
The inpainting task we aim to solve is to reconstruct the original image given an image with missing pixels. A text and mask overlay can also
be constructed similarly as a missing pixels problem. The data term we use for inpainting is
where is Hadamard’s product. The prior captured by the network utilizes the context of the image and interpolates the missing pixels from the known parts.
| Original | Corrupted | Restored |
|---|---|---|
 |
 |
 |
 |
 |
 |
 |
 |
 |
|
 |
 |
|
 |
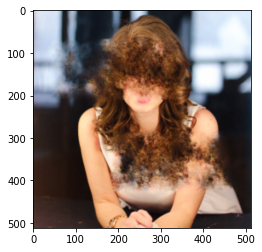 |
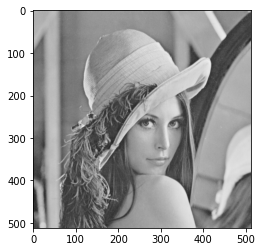
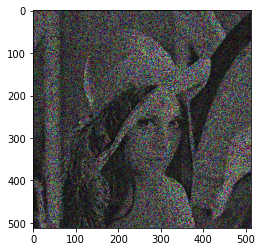
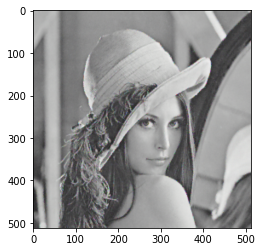
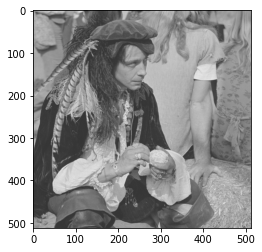
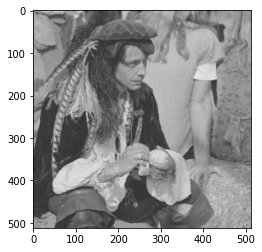
Image Restoration
Image restoration is a variant of the inpainting problem, and uses the same data term. The hyperparameters for this task differs from the default architecture, as given below:
| Original | Corrupted | Restored |
|---|---|---|
 |
 |
 |
 |
 |
 |
 |
 |
 |
| Barbara | Boat | House | Lena | Peppers | C.man | Couple | Finger | Hill | Man | Montage | |
|---|---|---|---|---|---|---|---|---|---|---|---|
| Deep Image Prior(Original) | 32.22 | 33.06 | 39.16 | 36.16 | 33.05 | 29.8 | 32.52 | 32.84 | 32.77 | 32.20 | 34.54 |
| Reproduced results(Ours) | 30.97 | 33.93 | 41.59 | 36.56 | 32.79 | 30.33 | 33.17 | 31.07 | 35.35 | 34.71 | 36.93 |
The results we have obtained are similar to the ones obtained in the original paper, hence proving a successful reproduction of the code.
Images from the results can be found in results folder in case you do not want to execute the Jupyter notebooks and only want to see the end results.
So is all this enough for a course project?
The criteria for completing the project is to reproduce the paper, without using any pre-existing code, or to reproduce an existing code implementation along with some additional criteria. The criteria we have chosen are the following:
- Reproduced
- Evaluate existing code
- New data
- New code variant
We have written about the evaluation of existing code above, where we mentioned that the code could be increased in readability and understandability and could be modularized for re-use and easier debugging. While we were evaluating the code, we felt that a different implementation which improved up on the code in the mentioned aspects. We have also used new data to evaluate our network, and as can be seen from the inpainting results, the network successfully solved the task for the new data too.
To find more such reproduced papers and projects, you can head on to this website.
References
[1] Ulyanov, D., Vedaldi, A., Lempitsky, V. (2018). Deep image prior. In Proceedings of the IEEE Conference on Computer Vision and Pattern Recognition (pp. 9446–9454).